How to upgrade the Aeotec Z-Stick 7 - USB 700 series Z-Wave controller
The Z-Stick 7 is a great Z-Wave controller to use for your home automation. It is very compact, supports the latest standards, and is widely support with automation software. There have been a couple generations of them with different controller chipsets, and the 7 uses the 700 series of Z-Wave silicon.
The safest way to upgrade firmware on anything is to make sure you have an accurate backup of the device.
Z-Wave devices are paired to a controller directly, so this means if the controller (in our case the USB Z-Stick) fails, we cannot talk to any Z-Wave devices and must manually re-pair them all. This can be a massive hassle, especially if the sensors are out of reach.
Components needed⌗
To pull this off, here is what we need:
- Home Assistant automation software installed (our is on a Raspberry PI)
- Current version as of this writing is 2022.8.5
- A Unix machine - this can be macos or Linux, can also be a Linux virtual machine (VM)
- A Z-Stick 7 with firmware < 7.17.2
First let’s verify the firmware version on our Z-Stick.⌗
-
Open Home Assistant, click on “Settings”, then “Devices & Services”
- Near the top of the page, click the “Devices” tab
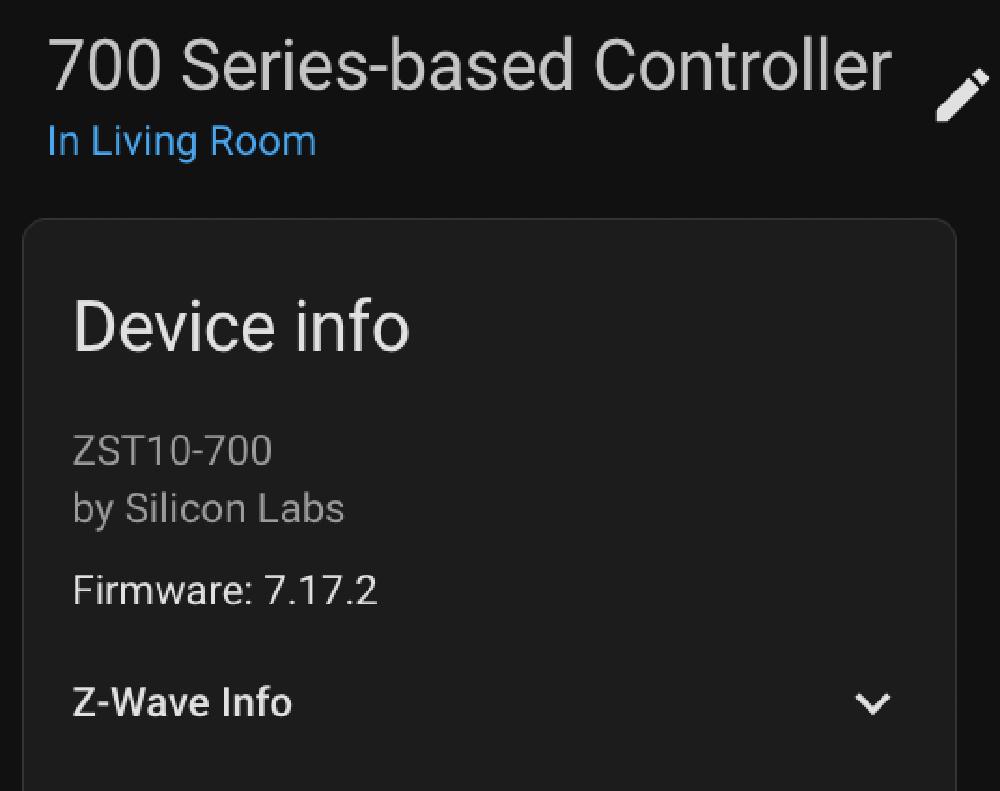
- The top device should be “700 Series-based Controller” or something similar, if not find it. This is our Z-Wave controller
- Click on it, and you should see the firmware version
- After this process, the version should be 7.17.2 as shown here:
TLDR;⌗
- Convert the built in add-on for z-Wave to the community add-on zwavejs2mqtt – More Information
- Copy the s0 and s2 network keys from the original add-on to zWavejs2mqtt
- Backup the Z-stick controller that is paired to the devices
- Flash the firmware on the Z-stick using minicom – More Information
Detailed Procedure⌗
1.⌗
Convert to zwavejs2mqtt - Estimated to take about 15 minutes
There are two items in play with Home Assistant - an Integration and an Add-on. The integration, which does all the device management is staying the same. This is called “Z-Wave JS”. Adding new devices won’t be changing at all. The Add-On will be changing, but for the most part you won’t notice any difference, just more functionality!
We need to switch the add-on from the Official Home Automation Z-Wave to a community maintained version made by Daniel Lando. The version we want is called zwavejs2mqtt. This is just as compatible with the official add-on and it allows much more functionality. What we are interested for this article is the ability to backup a controller. This will let us save a copy of all the Z-Wave devices that have been associated with our stick.
-
First make a backup of the entire Home Assistant configuration. We are also need these files to look at our Z-Wave security keys for later use
- Click on “Settings”, then “System”, then “Backups”
- In the bottom right corner click “Create Backup”
- Name this something you will remember. In this example its called “full-backup”
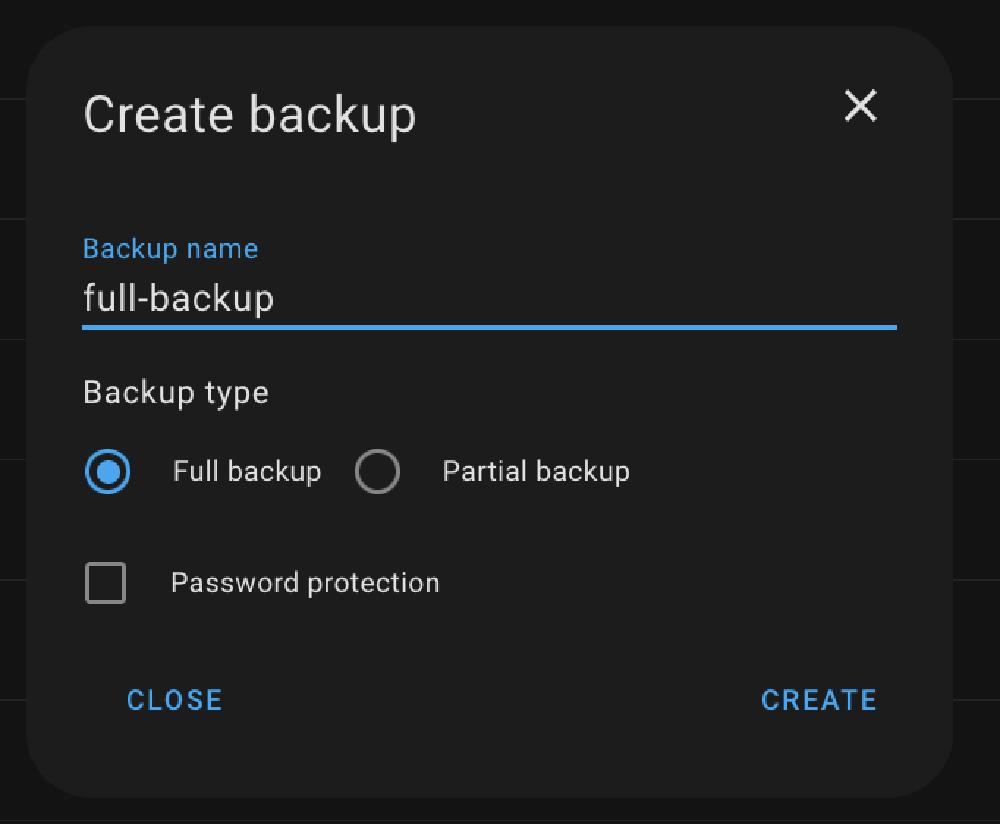
- Click “CREATE”
- This will take a minute, then return you to the list of backups
- In this list our backup should be right at the top, if not refresh the page
- Click on the backup name, and it will pop up a modal
- Click on the 3 buttons and then click “Download backup”
- Save this somewhere easy to get to, we will open this file next
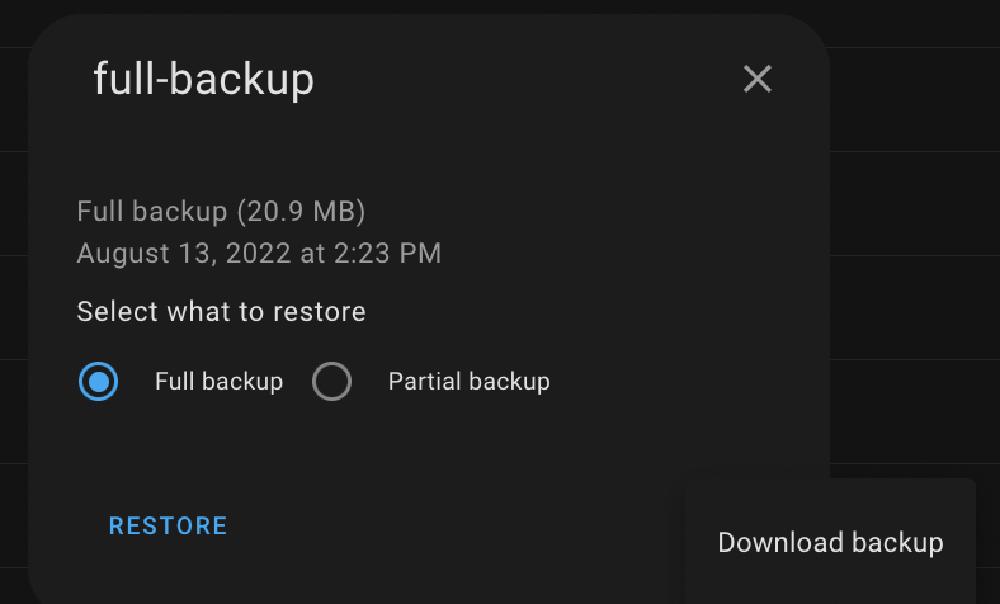
- This will most likely save the data as a tar file, this is natively supported on macos and Linux. Windows users will have to grab a program that can un-tar
- Once the file un-tar’s, go into the directory it created and there will be more files. The one we are interested in is “homeassistant.tar.gz”. Un-tar this one as well (gz means its gzipped, this should open the same as just a tar file on macos/linux)
- This should create another directory called homeassistant. Inside this directory there will be a data folder, then a hidden folder called .storage, then a file called “core.config_entries”
- core.config_entries will have the access keys we are looking for. Here is a quick way to get all the entries we need (s0_legacy_key, s2_access_control_key, s2_authenticated_key, and s2_unauthenticated_key)
cat homeassistant/data/.storage/core.config_entries | egrep "s0_legacy|s2_" # This will return something like: "s0_legacy_key": "xxxxxxxxxxxxxxxxxxxxxxxxxxxxxxxx" "s2_access_control_key": "xxxxxxxxxxxxxxxxxxxxxxxxxxxxxxxx", "s2_authenticated_key": "xxxxxxxxxxxxxxxxxxxxxxxxxxxxxxxx", "s2_unauthenticated_key": "xxxxxxxxxxxxxxxxxxxxxxxxxxxxxxxx", # Since these are security keys, I have changed mine to all x # They should have random numbers and letters- Save those keys somewhere and continue on to the next step
-
Now we need to disable the official Z-Wave add-on
- In home assistant, go to “Settings”, “Devices & Services”
- Here we will find the “Z-Wave JS” integration. Click the 3 dots and then “Disable”.
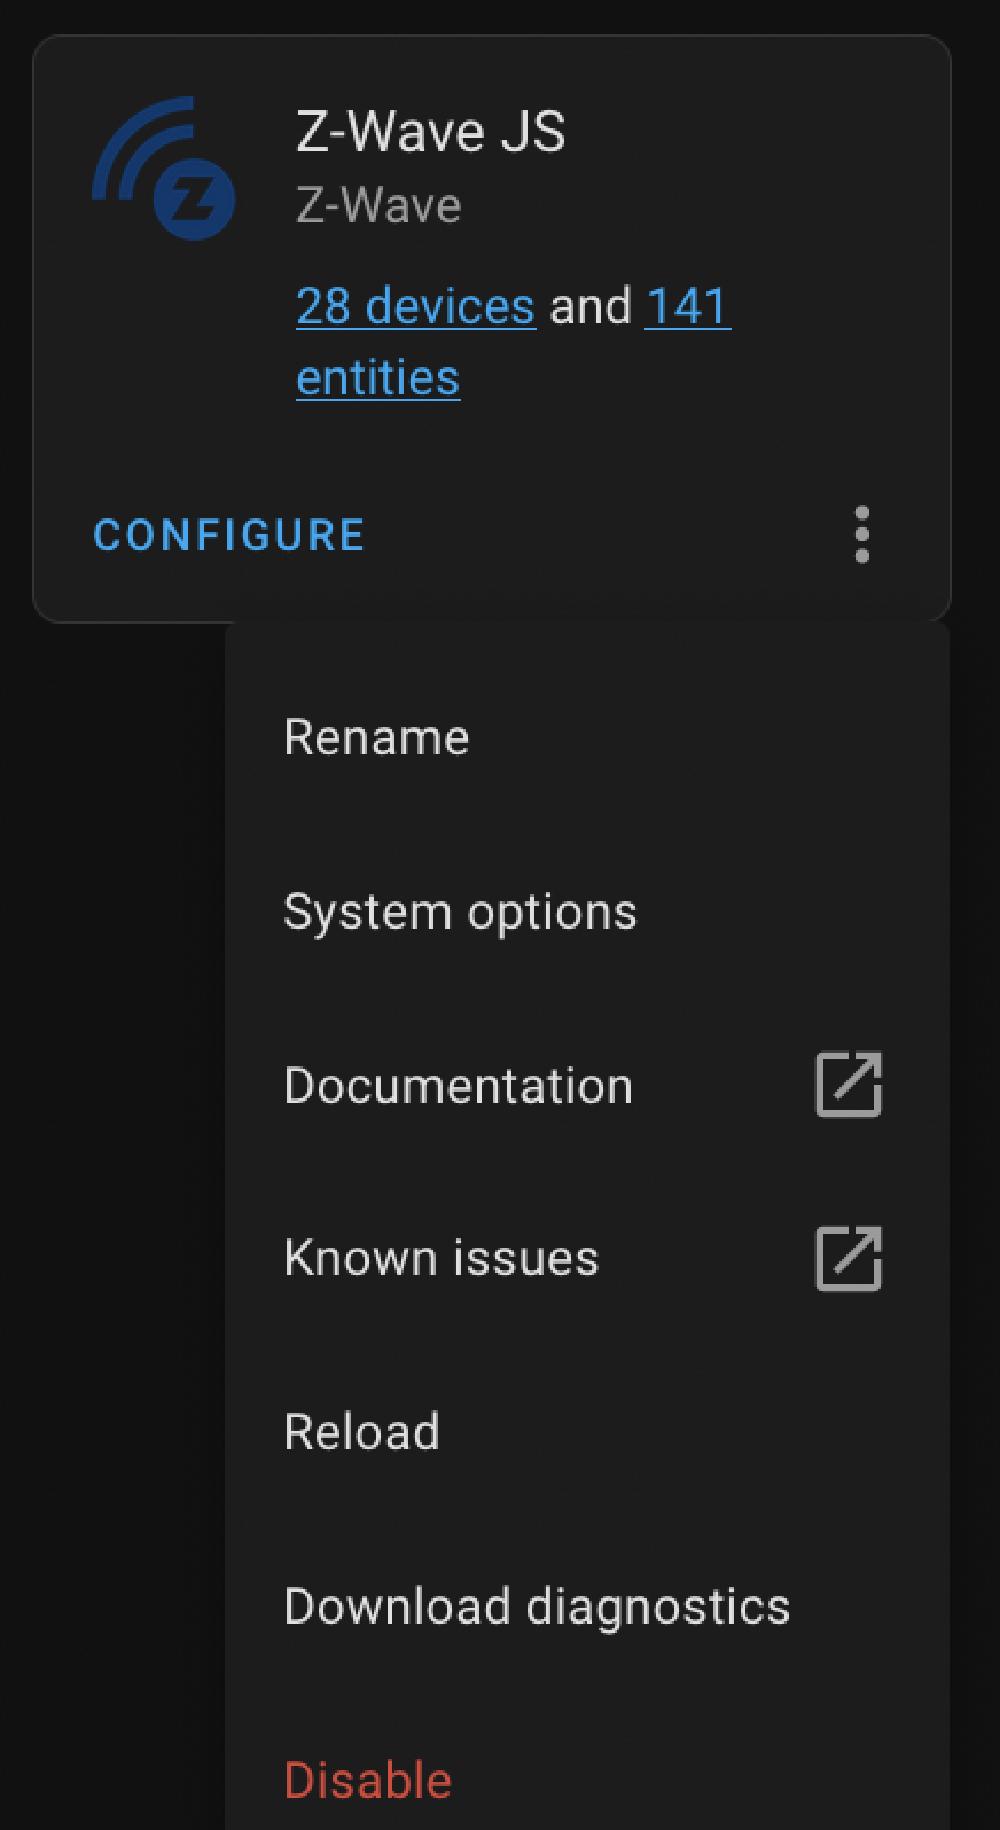
- Click OK that you want to disable. This won’t remove any configuration
-
Once that is disabled, we can install the new Z-Wave add-on
- Click on “Settings” then “Add-ons”, on the bottom right click on “ADD-ON STORE”
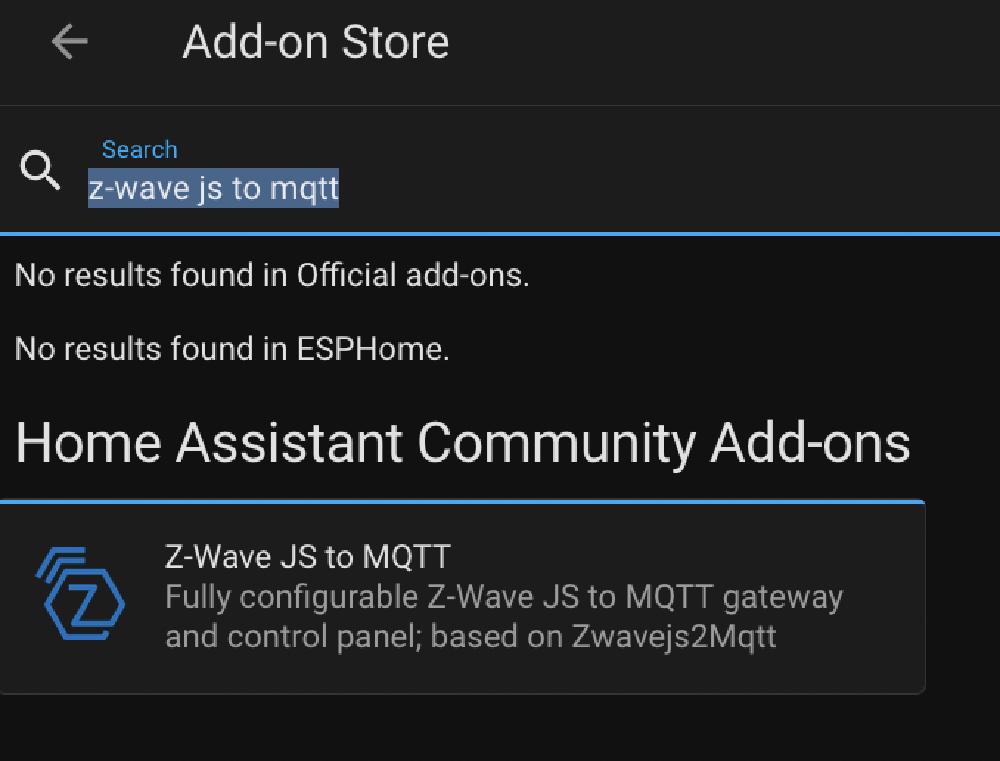
- In the search bar type “z-wave js to mqtt” and one result should return:
- Click on the result and it will take you to the add-on page
- Click “INSTALL”
- This will take a minute to download and install on your HA instance
-
Once installed, there are some settings that we need to configure before enabling the Z-Wave service
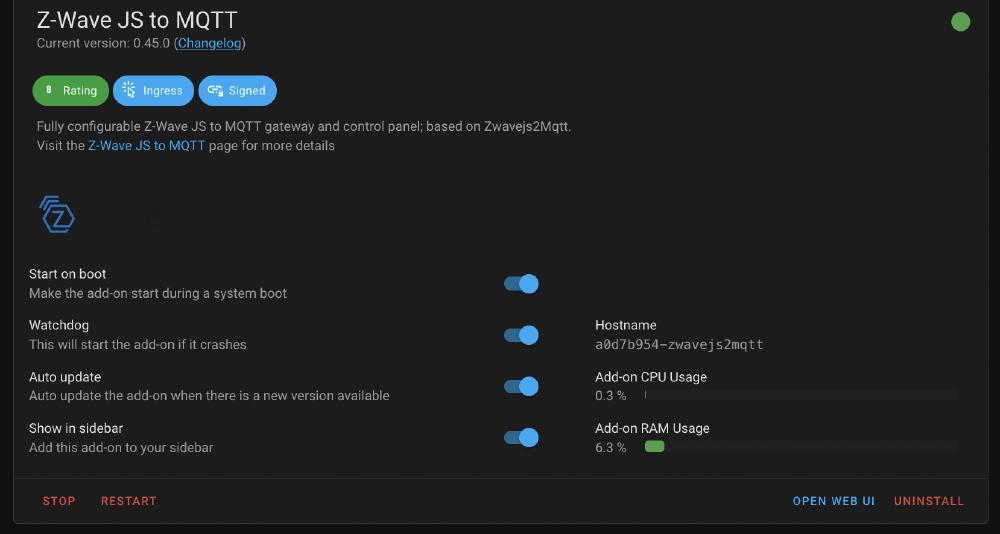
- First make sure all the options are enabled:
- Start on boot, Watchdog, Auto update, Show in sidebar
- Next save the hostname somewhere, it will look something like
a0d7b954-zwavejs2mqtt. We will need this once we install the Z-Wave integration again - Click on “OPEN WEB UI” and this goes to the configuration screen of the zwavejs2mqtt add-on
- First make sure all the options are enabled:
2.⌗
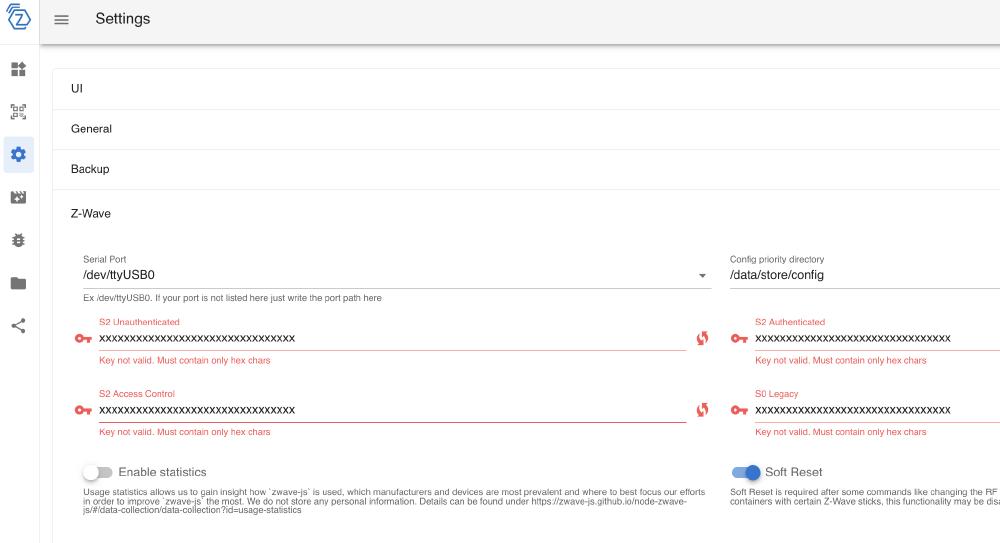
- Once the Web interface opens, click on the gear icon, which is settings
- Find the Z-Wave section and click on that
- We need to update the Serial Port of our device by clicking on the dropdown (typically /dev/ttyUSB0)
- We need to enter the four keys we recorded from earlier
- S2 Unauthenticated = s2_unauthenticated_key entry
- S2 Authenticated = s2_authenticated_key
- S2 Access Control = s2_access_control_key
- S0 Legacy = s0_legacy_key
- And finally enable “Soft Reset” if it isn’t
- On the bottom right of the whole page, click “SAVE”
Example:
-
We need to install the Z-Wave integration again (it is already installed but this step is necessary)
- Click on “Settings”, then “Devices & Services”, then in the bottom right click “ADD INTEGRATION”
- Search for “z-wave” and click on the Z-Wave integration at the bottom:
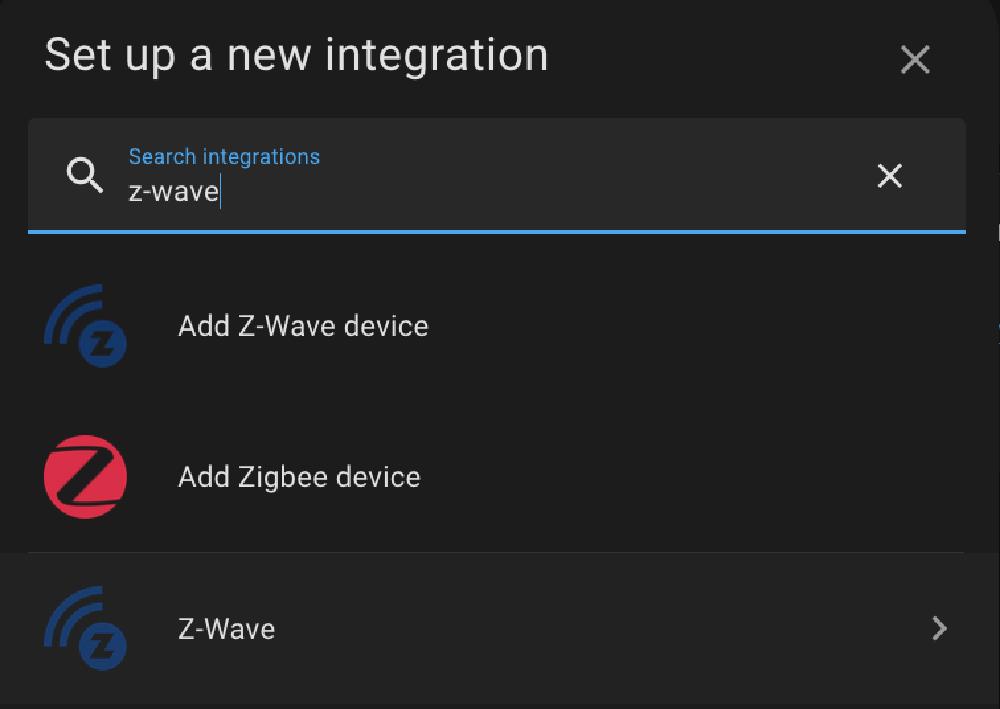
- Make sure to un-check the “Use the Z-Wave JS Supervisor add-on” option as this will conflict with the mqtt version we want
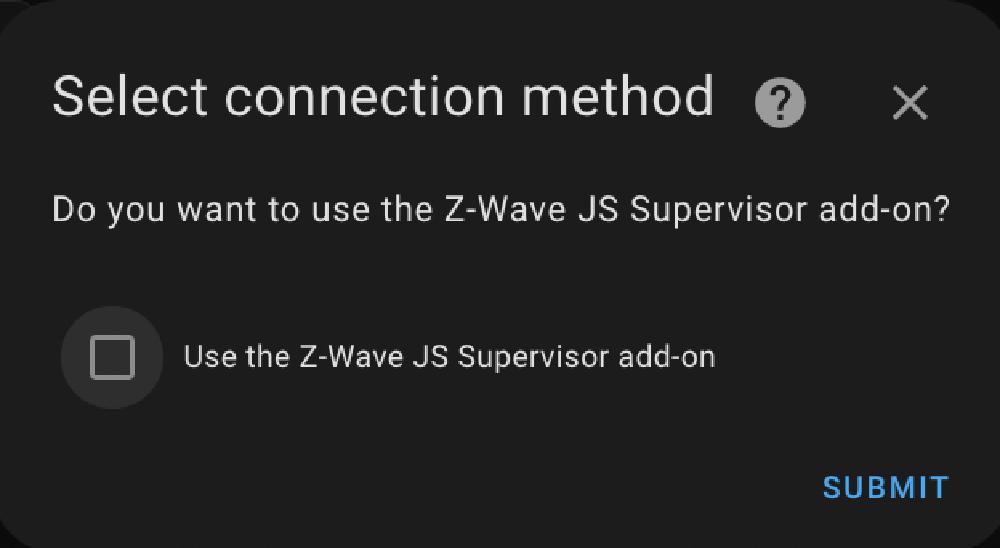
- Click “Submit”
- The next screen will ask for a URL that our new Z-Wave add-on is listening. Use the saved hostname from before, and enter the url like so (replace a0d7b954-zwavejs2mqtt with your hostname copied from the info screen):
ws://a0d7b954-zwavejs2mqtt:3000 -
Now we can enable our Z-Wave integration and verify everything is working properly
- Stay on the integrations screen (settings-> devices & services)
- The Z-Wave JS square may not show up because we need to show “disabled” integrations. On the top-right of the screen click “SHOW” next to disabled:

- On the Z-Wave JS square, there should be a button “Enable”, click it
-
We can now remove the official Z-Wave add-on
- Click on “Settings”, then “Add-ons”, click on the Z-Wave JS add-on (not the one with mqtt in the name). It should be greyed out already.
- Click on “UNINSTALL”
-
We should have our devices enabled and starting to populate in the Z-Wave JS UI. On the far left of the screen there should be a “Z-Wave JS” section, click on that
- On the first panel (Control Panel) this should show all of our Z-Wave devices and what state they are in. This may take a few minutes to populate properly.
- If the devices are not communicating properly, you can use the “Heal Network” option. This is located on the top right, under “ACTIONS”. Click “Advanced Actions”, then click “BEGIN” under Heal Network. This may take quite a while as it will try to communicate with every device and verify them.
- I had a couple z-wave devices that wouldn’t show in the list properly (they show as unknown device), the solution to that is to click on the bad device, click on “ADVANCED” in the top right on the device box, and click on “INTERVIEW”. This will re-interview the node and determine all the available entities. It shouldn’t change anything with your current setup (even for a working device), as this is communicating with the device and not changing the home assistant metadata (names of devices, names of entities, etc)
Hopefully at this point all the device statuses are green checkmarks.

3.⌗
With all of that out of the way, we can now backup our Z-Wave controller.
-
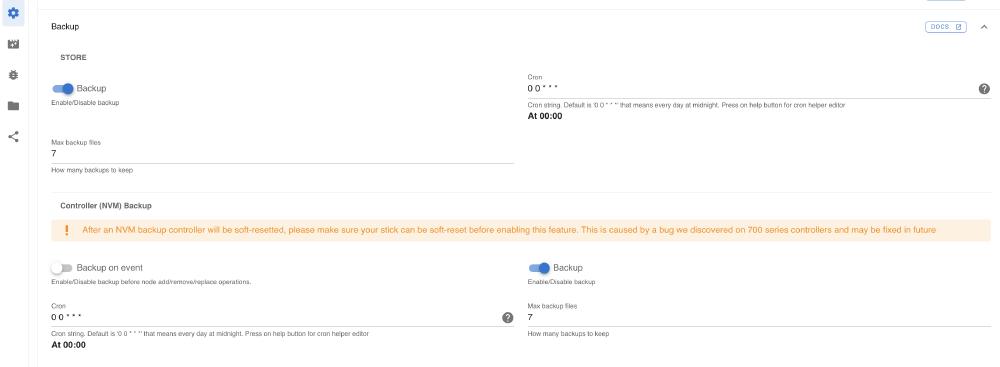
First we will setup automatic backups
- On the left of the Z-Wave JS panel, click on the settings icon (small gear)
- Enable both of the “Backup” options, one under “STORE” and the other under “Controller NVM Backup”:
- Now we can take our first backup!
- In the same Z-Wave JS panel, click on the top icon which is the Control Panel (looks like 4 small squares)
- On the far right, click on “ACTIONS”, then “ADVANCED ACTIONS”
- On the bottom right of this modal there will be a NVM Management section, under that click “BACKUP”
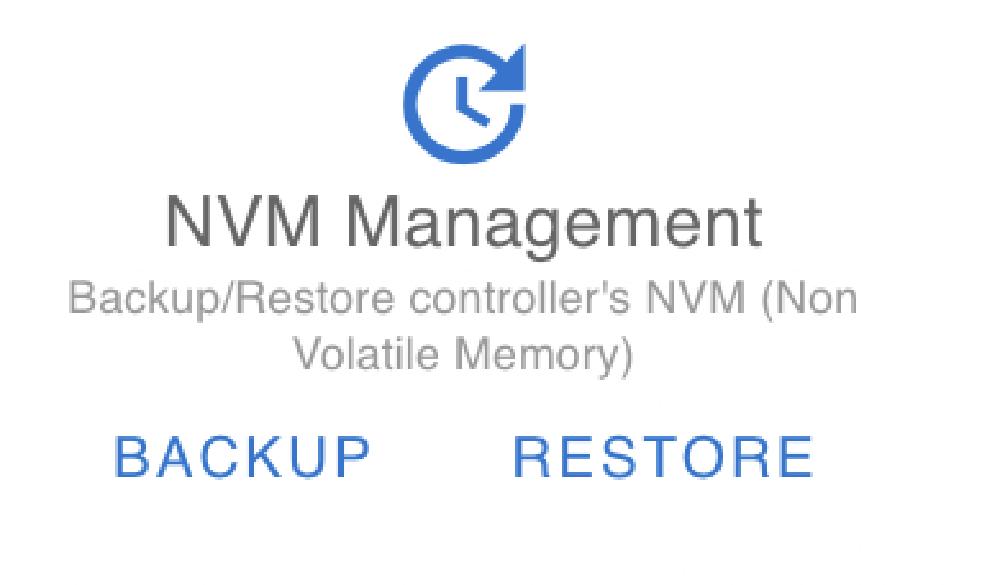
- Click OK to turn off the radio and backup the controller
- Once this finishes, it will try to save a .BIN file in your browser. Save this somewhere for safe keeping, you can now restore the controller to a new stick if this one ever fails!
4.⌗
Now that we have a valid backup of our Z-Wave controller/stick, we can flash the firmware on it. This way if the firmware process fails and leaves the stick un-usable, we can order a new one and restore all the z-wave configuration on it.
This part is estimated at about 10 minutes if it goes smoothly.
For this part, I highly recommend a version of Linux. Raspberry Pi’s are a cheap and easy way to run a Linux device. Macos will work as well, but haven’t tested it.
The Z-Stick 7 uses a common Silicon Labs chipset. The firmware for the US version of the chip is available here: ZW_SerialAPI_Controller_7_17_2_406_EFR32ZG14_REGION_US.gbl
For other versions, please refer to this page: 700 series
The basic process is to put the controller into bootloader mode, tell it to wait for firmware, and use minicom to send the firmware over the serial port.
- Download the gbl file to your Linux device and copy it to /tmp
- /tmp already exists in Linux and macOS so you don’t need to create that. We do need to create a directory inside /tmp so it is easier to find our gbl file with minicom.
mkdir /tmp/zwfirmware
cp ZW_SerialAPI_Controller_7_17_2_406_EFR32ZG14_REGION_US.gbl /tmp/zwfirmware
-
Install minicom and lrzsz to set the serial port up
- Linux:
sudo apt install -y minicom lrzsz - Macos: requires homebrew, get it here
brew install minicom lrzsz
- Linux:
-
Plug the Z-Stick 7 into our computer. We need to determine which serial port this used. It is typically “/dev/ttyUSB0”. A quick way in Linux is to run
dmesg | grep ttyand it should let you know which ttyUSBx its on. -
macOS serial ports are based on the device type, they will look something like tty.usbserial-110. Look for the name in /dev like this:
ls -al /dev/tty.usb*
Make sure to run as root for the follow steps to make life easier: sudo su -
-
Create a variable with the usb serial port you found (replace them with the correct tty):
- Linux:
export USBPORT=/dev/ttyUSB0- macOS:
export USBPORT=/dev/tty.usbserial-110
LANG="en_US.UTF-8"
Depending on the OS, we need to change into the minicom config directory.
Linux: cd /etc/minicom
Macos: cd /usr/local/Cellar/minicom/2.8/etc
Run the following to create the minicom configuration file.
cat << EOF > minirc.zwave
# Machine-generated file - use "minicom -s" to change parameters.
pu pname1           YUNYY
pu pname2           YUNYY
pu pname4           NDNYY
pu pname5           NDNYY
pu pname6           YDNYN
pu pname7           YUYNN
pu pname8           NDYNN
pu pname9           YUNYN
pu updir            /tmp/zwfirmware
pu port             $USBPORT
pu baudrate         115200
pu bits             8
pu parity           N
pu stopbits         1
pu rtscts           No
EOF
Configure the serial port speed (this doesn’t work for macOS):
Linux only: stty 115200 cs8 -cstopb -F $USBPORT
Soft reset the controller and wait a bit:⌗
Linux: printf '\x01\x03\x00\x08\xf4' > $USBPORT && sleep 10
macOS: printf '\x01\x03\x00\x08\xf4' > sudo stty -f $USBPORT cs8 -cstopb 115200 && sleep 10
Change into the bootloader so we can flash it:⌗
Linux: printf '\x01\x03\x00\x27\xDB' > $USBPORT && sleep 1
macOS: printf '\x01\x03\x00\x27\xDB' > sudo stty -f $USBPORT cs8 -cstopb 115200 && sleep 1
From here the procedure is the same for Linux and macOS.
Now we can start minicom and connect to our device:⌗
minicom -o zwave
If this works, you can press enter to see a prompt. If nothing shows up, remove the usb stick and repeat this process from the top again.
If a menu shows up (yey!), press 1 to upload the new firmware:
Gecko Bootloader v1.5.1
1. upload gbl
2. run
3. ebl info
BL >
begin upload
CCCC
You will see the letter C continuously repeating if its working correctly.
Now press “CTRL-A” then “s” to open a file dialog in minicom
- Select “xmodem” by pressing enter
- Move using your arrow keys and select the gbl file by pressing space. This can get tricky, so it make take a few tries to pick the correct file. Press enter
- This will take a minute or so to upload the file
Welcome to minicom 2.7.1

OPTIONS: I18n
Compiled on Dec 23 2019, 02:06:26.
Port /dev/ttyUSB0, 19:50:25
         +-----------[xmodem upload - Press CTRL-C to quit]------------+
Press CTR|S.gbl, 1252 blocks: Give your local XMODEM receive command no|
         |w.                                                           |
         |Bytes Sent: 160384   BPS:6162                                |
Gecko Boo|                                                             |
1. upload|Transfer complete                                            |
2. run   |                                                             |
3. ebl in| READY: press any key to continue...                         |
BL >     +-------------------------------------------------------------+
begin upload
CCCCC
- Once it finishes and looks successful, Press any key, then Press 2 to reboot it
The device will now reset and spit out control characters which look like trash.
Press CTRL-A then q to quit minicom.
Remove the Z-Wave stick and put it back into your Home Assistant device.
If all went well, it should boot up and you will see the new firmware!